
Getting started
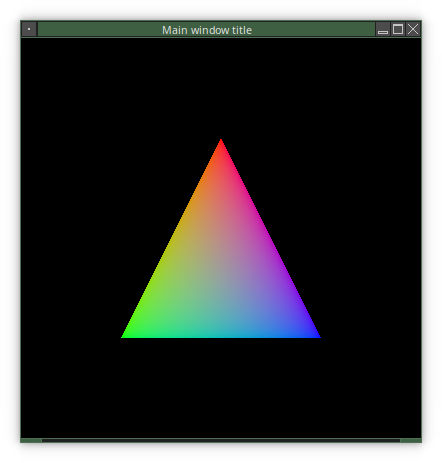
Hello Triangle
Lets start with drawing a triangle. Using exclusively the Vulkan API, that requires over 1300 lines of code and then that severely limits itself in terms of (future) flexibility. For example, it has several 1-on-1 relationships builtin that in fact should be 1-on-N relationships.
We too will start with a “Hello World” triangle application, using linuxviewer, but that will give you tremendous flexiblity from the start. There isn’t even a way to create an application that doesn’t give you that.
However, before we can do this, we will need to download, configure and compile all the git submodules that are involved, as well as set up some environment.
Required packages
Archlinux
As usual, it is recommended to first do a full system upgrade with sudo pacman -Syu. Then proceed with installing the required packages:
sudo pacman -S --needed base-devel git cmake ninja
sudo pacman -S --needed boost sparsehash eigen systemd
sudo pacman -S --needed blas lapack libxml++ libxcb libxkbcommon-x11 xorgproto xcb-proto
sudo pacman -S --needed shaderc vulkan-headers vulkan-icd-loader vulkan-validation-layers vulkan-utility-libraries
Note that ninja is an alternative make and is only required if you intend to configure with ‑GNinja (see below).
Debian/Ubuntu
sudo apt install build-essential autoconf pkg-config libtool gawk git cmake ninja-build
sudo apt install libboost-all-dev libsparsehash-dev libeigen3-dev libsystemd-dev
sudo apt install libblas-dev liblapack-dev libxml++2.6-dev libxcb-xkb-dev libxkbcommon-x11-dev
sudo apt install libvulkan-dev wget
Debian/Ubuntu do not have libxml++3.0, at the time of writing, but linuxviewer also supports libxml++2.6 for that reason. That version is never tested anymore, but it should work.
Also the package shaderc does not seem to exist; it is therefore added to gitache (see below) if not found on the system.
Finally, the Vulkan SDK is not maintained by debian/ubuntu. You have to add the third-party repository of LunarG as described here: Getting Started with the Ubuntu Vulkan SDK. Scroll down to Install the SDK for instruction on how to install the Vulkan SDK on Ubuntu.
For example (but please check that webpage for up to date info!), for Ubuntu 20.04 (Focal Fossa) you’d do:
wget -qO - http://packages.lunarg.com/lunarg-signing-key-pub.asc | sudo apt-key add -
sudo wget -qO /etc/apt/sources.list.d/lunarg-vulkan-focal.list http://packages.lunarg.com/vulkan/lunarg-vulkan-focal.list
sudo apt update
sudo apt install vulkan-sdk
Please see the above link to vulkan.lunarg.com for instructions for your Ubuntu version.
Downloading linuxviewer
All source code is retrieved from github. There is no tar ball available for download. The linuxviewer repository contains everything that we will need for our triangle: it contains all the aicxx submodules, the source code of the Vulkan Engine itself, and a complete Triangle application.
Gitache
Well, almost everything. Linuxviewer is also using (third-party) software from github that are standalone projects, not git submodules.
Those are downloaded using gitache into a caching directory, where they are configured and built. You are required to set an environment variable that points to this location before gitache will do that. For linuxviewer you also want to set the AUTOGEN_CMAKE_ONLY environment variable.
Therefore, add the following to your environment (for example, your ~/.bashrc ):
export GITACHE_ROOT=/opt/gitache
export AUTOGEN_CMAKE_ONLY=1
Make sure that the /opt/gitache directory (change as required) exists and is writable by the user that will compile linuxviewer. My current cache contains 1.8 GB of data; but even a fresh install uses 1 GB.
If you do not set this environment variable, you’ll see
-- Environment variable GITACHE_ROOT is not set: gitache disabled.
during configuration of linuxviewer, and that won’t work (later on).
What you should see during configuration, is
** Populating gitache:
-- GITACHE_ROOT = "/opt/gitache"
Cloning the repository
Now you are ready to download linuxviewer and the git submodules. Change directory to where you want to create the linuxviewer repository folder and enter,
git clone --recursive https://github.com/CarloWood/linuxviewer.git
Configuration
Libcwd
Linuxviewer makes heavy use of libcwd which will automatically be downloaded, configured and compiled by gitache.
However, it requires you to create an rc file. This file can be put in the current working directory, but I recommend to just create a suitable .libcwdrc in your home directory.
If you do not do so, any program using linuxviewer that was configured (see below) with CMAKE_CONFIG set to Debug or RelWithDebug will stop with the message:
COREDUMP : vkerror must be turned on from .libcwdrc (and so do all other vk* debug channels).
To fix that please create a file ~/.libcwdrc with the following content:
silent = on

# libcwd default debug channels.
channels_on = warning,notice,debug
channels_off = bfd,demangler,malloc,system
# utils
channels_on = delayloop,tracker
# evio
channels_on = tls,decoder,xmlrpc
# threadpool
channels_on = threadpool, threadpoolloop, timer, timers
# statefultask
channels_on = statefultask,stinternal,broker
# dbus-task
channels_on = dbus
# linuxviewer debug channels.
channels_on = vulkan,vkerror,vkwarning,vkinfo
channels_on = renderpass,permutation,shaderresource,setindexhint
channels_off = xcb,xcbmotion,vkframe,imguilib,usage,imgui

# Required when using Debug(attach_gdb());
gdb = /usr/bin/gdb $GDBCOMMANDFILE
xterm = konsole --name "attach_gdb" --hide-menubar --nofork --workdir "$PWD" --geometry 165x24-0-0 -e %s
Linuxviewer
cd linuxviewer
CMAKE_CONFIG=RelWithDebug   # Use Debug if you are a developer.
BUILD_DIR=build
cmake -S . -B ${BUILD_DIR} -DCMAKE_BUILD_TYPE=${CMAKE_CONFIG} -DEnableDebugGlobal:BOOL=OFF
Optionally add -DCMAKE_VERBOSE_MAKEFILE:BOOL=ON to see the compile commands. Also optionally, add -GNinja to the cmake arguments (this is what I am developing with).
Other build types that can be used for CMAKE_CONFIG are: Release, RelWithDebInfo, Debug and BetaTest. See stackoverflow for an explanation of the different types.
Building
NUMBER_OF_CPUS=$((`nproc` - 2))
cmake --build ${BUILD_DIR} --config ${CMAKE_CONFIG} --parallel ${NUMBER_OF_CPUS}
Just set NUMBER_OF_CPUS to whatever you want, of course.
After this successfully finished you should find an executable in ${BUILD_DIR}/src/examples/hello_triangle/hello_triangle that will draw a triangle. The next chapter goes over the source code used and describes in detail how it is built up.